 Administration > Data Collector Administration > SiteScope Administration > Installing SiteScope > Installing SiteScope for Windows > Connecting to SiteScope on Windows Platforms
Connecting to SiteScope on Windows Platforms
SiteScope is installed to answer on two ports: 8080 and 8888. If there is another service configured to use these ports, the installation process will attempt to configure SiteScope to answer on another port. SiteScope will update the port number information in the file Open_SiteScope.htm. This file is an HTML page that is found in the SiteScope installation directory. On Windows platforms, the installation process also adds a link to this file in the Start > Programs menu for SiteScope. The Start menu folder is selected during the installation procedure.
Accessing the SiteScope 8.x Interface
To access SiteScope using the new interface, click the Open SiteScope link on the Open SiteScope page. A new browser instance opens. Alternatively, you can enter the address in a Web browser. The default address is: http://localhost:8080/SiteScope.
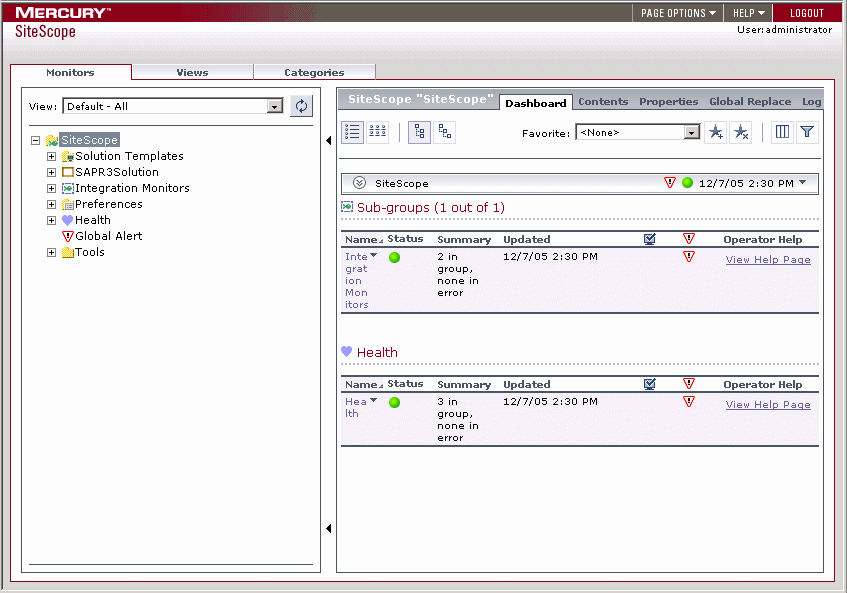
If this is the first time that this installation of SiteScope is accessed, there may be a slight delay as some of the interface elements are initialized. SiteScope opens to the Dashboard view, an example of which is shown in the following figure.
Accessing the SiteScope Classic Interface
Use the following steps to access SiteScope using the Classic interface.
To access SiteScope using the Classic interface:
- Click the Open SiteScope Classic link on the Open SiteScope page. A new browser instance opens. Alternatively, you can enter the address in a Web browser. The default address is: http://localhost:8888/SiteScope. If this is the first time that this installation of SiteScope is accessed, the SiteScope Welcome screen for first-time setup opens.
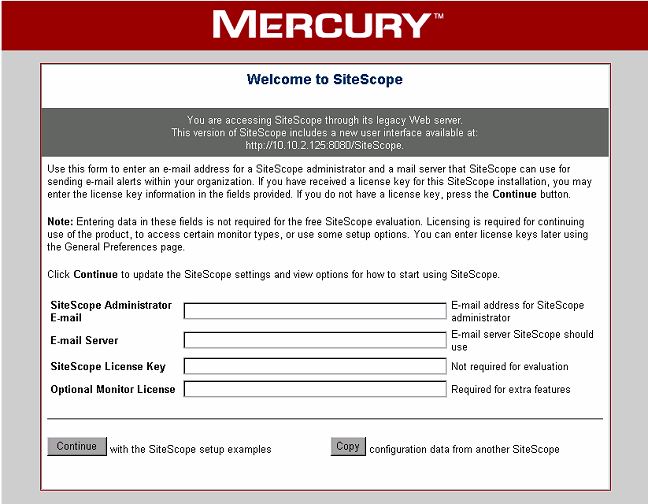
- Verify the SiteScope Administrator e-mail address entered in step 6 above. Enter the address of the SMTP mail server that SiteScope should use to forward e-mail alerts. If you have received a new license key or optional monitor license for SiteScope from Mercury, you may enter the license information in the appropriate field.
- Click Continue to save any changes and proceed to the next step. An update screen opens and refreshes automatically to the SiteScope First-time Setup - Getting Started screen.
- Start Now - This option starts SiteScope and adds a number of example monitors organized into several subgroups. These example monitors are contained within a monitor group labeled Examples. You can access this group by clicking the name of the group on the SiteScope main page.
- Skip Defaults - This option starts SiteScope without creating any example or default monitors. The SiteScope main page is displayed without any groups. Use the Create Group link to add new groups as containers for SiteScope monitors.
- Copy Monitors - This option copies monitor and alert configurations from another SiteScope installation to this installation. This is useful when moving a SiteScope installation from one server to another.
- Select the setup option you want by clicking the appropriate button. An update page opens and refreshes automatically to the SiteScope main page. The following view shows the SiteScope main page after selection of the Start Now setup option.
Note: SiteScope 8.0 requires a new license key. License keys from earlier versions of SiteScope are not valid to operate SiteScope 8.0. Entering an invalid license may make the product inaccessible. Contact your Mercury sales representative to convert your existing license to a SiteScope 8.0 license.
Note: It is not necessary to enter license information at this point to use SiteScope during the free evaluation period.
If you are upgrading a previous SiteScope installation, license information from the previous SiteScope installation will be displayed. If you are changing your SiteScope licensing, you can enter the changes in the applicable text field.
The First-time Setup - Getting Started screen presents several options for setting up SiteScope. The options are:
Note: To use the Copy Monitors feature, the source SiteScope installation must be running and be accessible via HTTP to the target SiteScope installation.
At this point, the SiteScope application is running and ready to begin monitoring system availability in your infrastructure.
If you selected to Start Now with the default monitor examples, you can click on the name Examples on the console to view the contents of the Examples group. Refer to the SiteScope Help for information about working with SiteScope. You click the Help button to access the online version of the SiteScope documentation.