 Deployment > Deploying Servers > Mercury Business Availability Center Server Installation for Windows > Installing Mercury Business Availability Center Servers on a Windows Platform > Installing Mercury Business Availability Center Servers
Installing Mercury Business Availability Center Servers
You install Mercury Business Availability Center 6.1 servers—the Centers Server, Core Server, and Data Processing Server—from the Mercury Business Availability Center 6.1 Setup CD-ROM provided with the Mercury Business Availability Center distribution package. Unless you install on a machine running IIS, Mercury Business Availability Center installs Apache HTTP Server (adapted for Mercury Business Availability Center) during the installation process.
You need administrative privileges for the machine(s) on which you are installing Mercury Business Availability Center servers.
Note: For installation troubleshooting, refer to the Mercury Customer Support Knowledge Base, which can be accessed from the Mercury Business Availability Center Help menu or from the Mercury Customer Support Web site.
In addition, refer to the Mercury Business Availability Center readme file (located in the Mercury Business Availability Center Setup CD-ROM root directory) for last-minute technical and troubleshooting information.
To install Mercury Business Availability Center servers:
- Insert the Mercury Business Availability Center Setup CD-ROM into the drive from which you want to install. If you are installing from a network drive, connect to it.
- From the Start menu, select Run.
- Type the location from which you are installing, followed by setup.exe. Note that the setup file for Mercury Business Availability Center servers is located in the CD-ROM root directory. For example, type d:\setup.exe.
- Click OK. If Mercury Business Availability Center detects a previous Topaz installation on the machine, a message is displayed warning that any customized configuration data will be overwritten.
- Setup begins. Follow the on-screen instructions for server installation.
- Installing on a Windows platform with remote services running in application server mode:
- The following window appears if Windows detects a wrong user mode for the installation:
- Selecting the setup type:
- Select Typical setup type for a standard (Mercury Business Availability Center box) installation that installs the Core Server, Centers Server, and Data Processing Server on the machine, as well as MDAC.
- Select Custom setup type to select the Mercury Business Availability Center features to be installed on the machine. For a description of the installed features, see Features Included in Mercury Business Availability Center Server Installation.
- Selecting the Web server type:
- If Mercury Business Availability Center does not detect an installation of Microsoft IIS on the machine, you are offered the Apache HTTP Server option only. If you want to run Mercury Business Availability Center with Microsoft IIS, click Cancel to exit Mercury Business Availability Center Setup. Install IIS and rerun the Mercury Business Availability Center installation.
- Configuring connection settings:
- For Apache HTTP Server - if port 80 (default port) is already in use by the existing Web server, Mercury Business Availability Center notifies you of this. Resolve the conflict by either entering a different port number (in which case, Mercury Business Availability Center configures Apache HTTP Server to use the defined port), or exiting Setup and changing the port number of the existing Web server, then rerunning the installation procedure. For more information, see Working with the Web Server.
- For Microsoft IIS - if IIS is using a port other than port 80, enter the IIS port.
- Specifying the SMTP mail server:
- It is recommended that you specify the complete Internet address of your SMTP server. Use only alphanumeric characters.
- In the Sender name box, specify the name to appear in scheduled reports and on alert notices that Mercury Business Availability Center sends. Accept the default name ("MercuryAM_Alert_Manager") or type another sender name.
- When Setup has completed the installation of the Mercury Business Availability Center server files, select whether you want to continue with the set management database stage immediately, or finish the server installation and set database parameters later. The preferred method is to create the management schema manually, and then to run the set management database utility later to connect to it.
Note the following during the server installation stage:
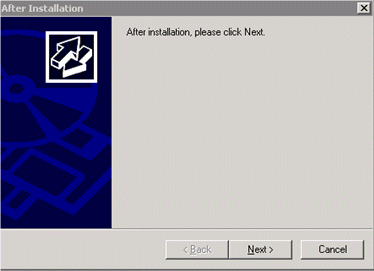
Click Next when the installation is complete and follow any other instructions that may appear in the window.
For more information on this subject, refer to Microsoft Knowledge Base Article - 252330.
For instructions on creating the management database manually on MS SQL Server, see Creating Databases in Preparing the Database Environment. For instructions on creating the user schema manually on Oracle Server, see Management User Schema in Preparing the Database Environment.
For information on setting database parameters (whether it is done as part of Setup, or run at a later time), see Setting Management Database Parameters for a Windows Platform.
For information on completing Mercury Business Availability Center server installation, see Completing Server Installation and Launching Mercury Business Availability Center.